How to use Reset Button on CISS CIS Continuous Ink Supply System
Reset cartridges
- Open the lid ( scanner door).
- Remove the door sensor ( yellow plug),
- When cartridges come to the change position, Hold the white/back the reset button on top of the cartridges for 3 sec.
- Cover the door sensor with the yellow plug.
- Close the door of the printer, because it has a light sensor and it's necessary to close the lid on top of the plug.
There are chips on the end of each cartridge which have a 'memory' of how much ink you have used. Printers also have a 'memory' of your usage. These memory systems assume you've run out of ink when you have consumed a certain amount. They don't realise that you have a large external tank feeding your cartridges. So after some time, you'll get a message on your PC screen telling you to replace your cartridges. Check your ink level in the external tanks. Most likely there will still be a ink in these tanks. If this is the case, you'll need to reset the chips using the little White/Black reset button on the cartridge. Simply press and hold the white reset button on the cartridge for 3-4 seconds. when cartridges are in the change position.
Please see the video below:
Please Note: Maybe the shape of the tank is/are different(s).
 Warning :
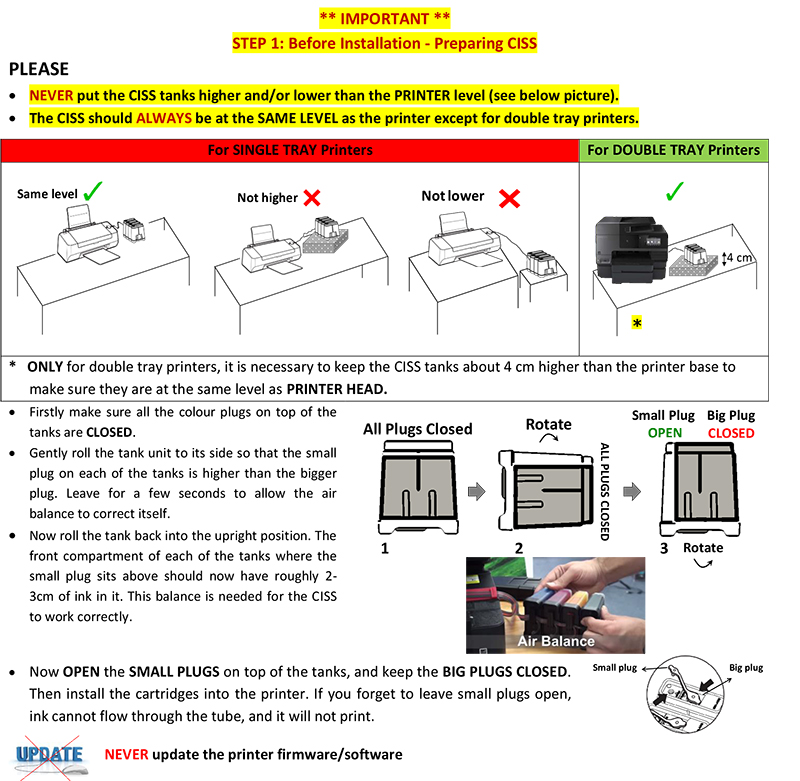
Never raise the external tank higher than your printer (even temporarily)!

 MIR-AUS Pty LtdUnit 2 / 11 Jullian Close, Banksmeadow, NSW 2019 (Sydney/Australia)